

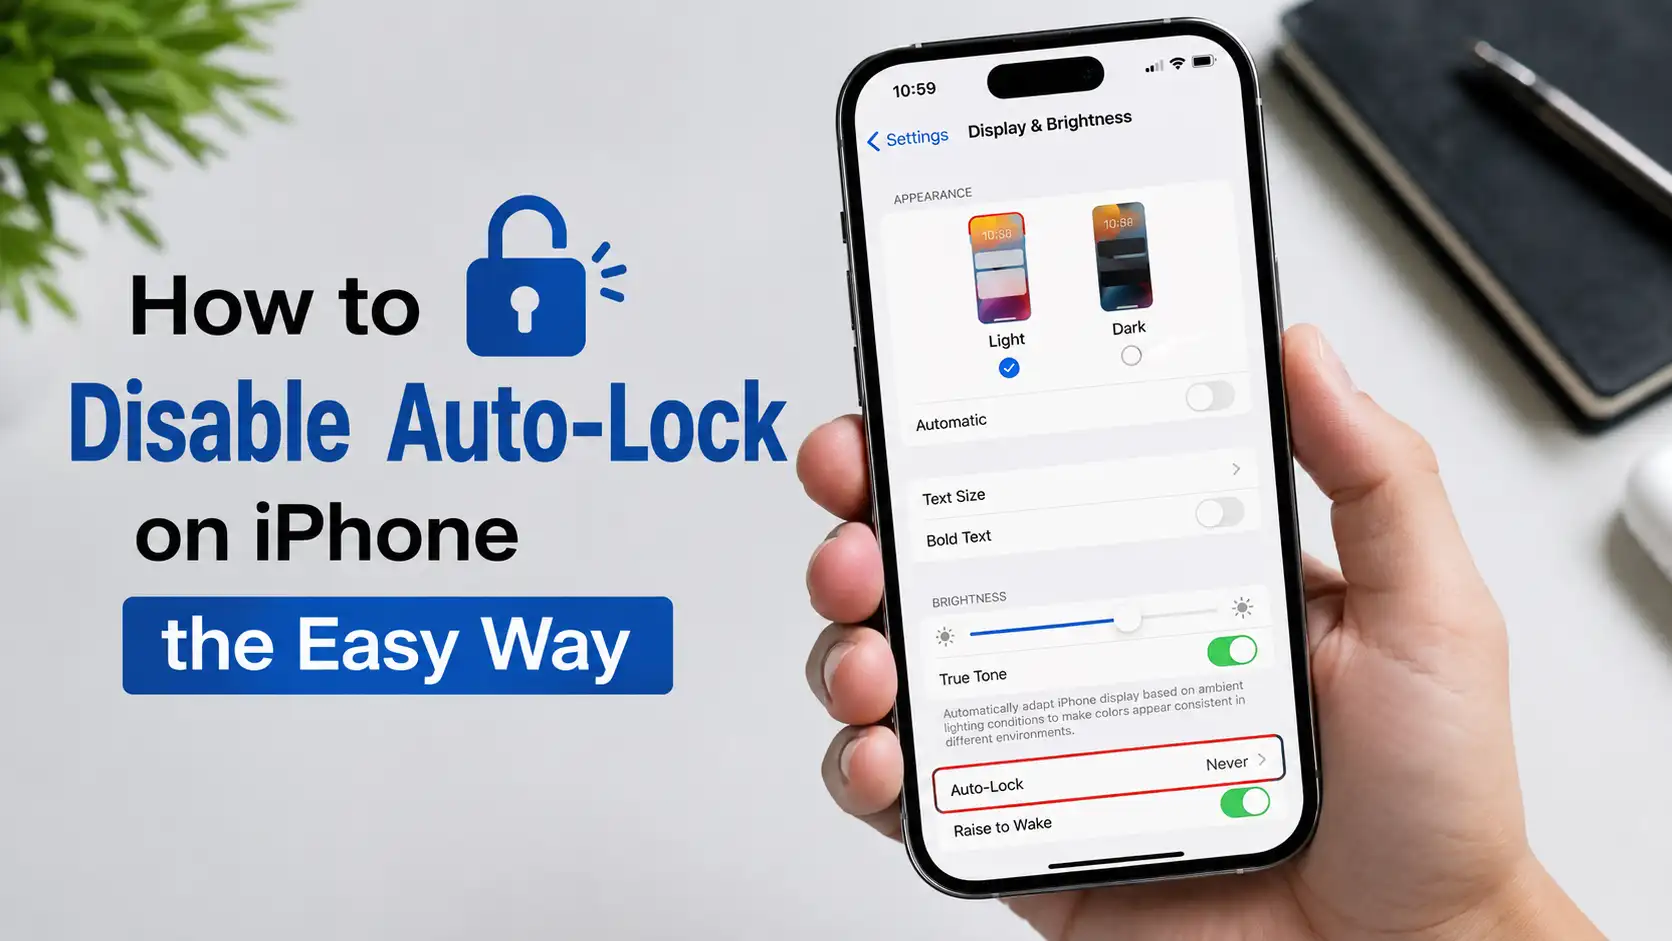
Have you ever been reading an important email, following a cooking recipe, or watching a tutorial on your iPhone when the screen suddenly goes black? It’s one of those small annoyances that can quickly interrupt your workflow. Every time the display turns off, you have to wake your iPhone, unlock it, and find where you left off. While this behavior is designed to save battery and protect your personal information, it isn’t always convenient, especially when you’re actively using your device without touching the screen for a while.
Fortunately, Apple makes it easy to customize how long your iPhone stays awake before automatically locking. Whether you want the display to remain on while you’re studying, using navigation, giving a presentation, or reading a long article, changing the Auto-Lock setting only takes a few taps. Better yet, you can switch the setting back whenever you no longer need it, giving you complete control over how your iPhone behaves in different situations.
In this guide, you’ll learn exactly what Auto-Lock is, why you might want to disable it, how to turn it off, what to do if the Never option isn’t available, and how to avoid common issues after changing the setting. By the end of this article, you’ll know when disabling Auto-Lock is helpful, when it’s better to leave it enabled, and how to balance convenience with battery life and security.
What Is Auto-Lock on iPhone?
Auto-Lock is a built-in feature in iOS that automatically turns off your iPhone’s display after a certain period of inactivity. Once the screen turns off, the device locks itself, requiring Face ID, Touch ID, or your passcode before it can be used again. Apple includes this feature to help protect your personal information while also reducing unnecessary battery consumption, since the display is one of the most power-hungry components inside any smartphone.
Depending on your iPhone model and software settings, you can usually choose an Auto-Lock timer ranging from 30 seconds to 5 minutes, or select Never if you don’t want the display to lock automatically. Although the default setting works perfectly for everyday use, changing it can significantly improve your experience when you’re reading, watching, presenting, or using your iPhone as a dedicated display for extended periods.
Why Would You Want to Disable Auto-Lock?
For most users, Auto-Lock is a helpful feature that quietly works in the background. However, there are many everyday situations where constantly unlocking your phone becomes more frustrating than beneficial. Disabling Auto-Lock allows your display to remain visible until you manually lock it, making certain tasks much easier and far more comfortable to complete.
Instead of repeatedly tapping the screen every minute or two, you can focus entirely on what you’re doing. Whether you’re working, learning, cooking, traveling, or simply relaxing with a good article, keeping the display awake eliminates unnecessary interruptions and creates a smoother overall user experience.
Reading Long Articles
Reading lengthy blog posts, digital books, PDFs, or research documents often involves moments where you stop scrolling to absorb information, and during those pauses Auto-Lock may activate unexpectedly. Disabling the feature allows you to read comfortably at your own pace without constantly unlocking your iPhone, making it especially useful for students, professionals, and anyone who spends long periods reading on their device.
Following Recipes or Tutorials
Whether you’re preparing dinner, assembling furniture, repairing electronics, or following a workout routine, your hands are often too busy to keep waking your phone every few minutes. Turning off Auto-Lock ensures recipes, instructions, or tutorial videos remain visible throughout the entire process, allowing you to concentrate on the task instead of repeatedly interacting with your device.
Using iPhone as a Display
Many people use their iPhone as a navigation screen, digital desk clock, smart home controller, presentation display, or live information dashboard. In these situations, having the screen stay on continuously is much more practical because the information remains visible at a glance without requiring you to unlock the phone every time the display goes to sleep.
Things to Know Before Turning Off Auto-Lock
Disabling Auto-Lock certainly offers greater convenience, but it’s important to understand the trade-offs before selecting the Never option. While keeping the display awake makes certain activities much easier, it also changes how your iPhone manages power and protects your personal information. Knowing these advantages and disadvantages helps you decide whether disabling Auto-Lock is the right choice for your particular situation.
Fortunately, you don’t have to leave Auto-Lock disabled permanently. Many users switch to Never only when needed, such as during presentations or while following tutorials, then return to a shorter timeout afterward. This flexible approach lets you enjoy the benefits of both convenience and security without making a permanent compromise.
Battery Life Considerations
Leaving your iPhone’s display on continuously increases battery usage because the screen consumes more power than almost any other hardware component. The higher your brightness level and the longer the display stays active, the faster your battery drains, so disabling Auto-Lock is generally best reserved for situations where you’re near a charger or only need the screen to remain on temporarily.
Privacy and Security Risks
Auto-Lock automatically protects your personal information whenever you stop using your iPhone, but disabling it means the screen remains accessible until you manually lock the device. If you accidentally leave your phone unattended in a public place, other people may be able to view notifications, messages, emails, or other sensitive information before the device is secured automatically.
How to Disable Auto-Lock on iPhone
Disabling Auto-Lock on an iPhone is a straightforward process that only takes a few moments. Apple places this setting inside the Display & Brightness menu, making it easy to access whenever you want to change how long your screen stays on. Whether you’re using a recent iPhone running the latest version of iOS or an older supported model, the steps are generally the same, so you won’t need to install any additional apps or make complicated changes.
Before you begin, make sure your iPhone is unlocked and running normally. If you’re using Low Power Mode, you may notice that some Auto-Lock options are unavailable. In most cases, disabling Low Power Mode first will restore the full list of available Auto-Lock settings, including the Never option on supported devices.
Step 1: Open Settings
Start by unlocking your iPhone and tapping the Settings app from your Home Screen or App Library. The Settings app is where Apple stores nearly every system preference, including display options, battery management, privacy controls, and accessibility features.
Step 2: Navigate to Display & Brightness
Inside the Settings app, scroll down until you find Display & Brightness, then tap it to open the display settings menu. Here you’ll find several options related to your screen, including Brightness, Appearance, Text Size, True Tone, Night Shift, and the Auto-Lock setting.
Step 3: Select Auto-Lock
Tap Auto-Lock to open the available timeout options. Depending on your current settings and whether Low Power Mode is enabled, you’ll typically see choices ranging from 30 Seconds to 5 Minutes, along with the Never option if your iPhone allows it.
Step 4: Choose Never
Select Never to disable Auto-Lock completely. Once selected, your iPhone will no longer turn off the display automatically due to inactivity, meaning the screen will remain on until you manually press the Side button to lock the device or the battery becomes depleted.
What If the Never Option Is Missing?
Some users are surprised to discover that the Never option isn’t available in the Auto-Lock menu. This doesn’t necessarily mean there’s something wrong with the iPhone. Instead, certain software settings or administrative restrictions can temporarily remove or limit the available Auto-Lock choices. Fortunately, identifying the cause is usually simple, and in many cases the issue can be resolved within a minute or two.
If you’ve opened the Auto-Lock settings and only see shorter timeout options, don’t panic. Checking a couple of common settings is often all that’s needed to restore the missing option. However, if your iPhone is managed by an employer or educational institution, you may need assistance from the organization’s IT administrator instead of changing the setting yourself.
Low Power Mode Is Enabled
When Low Power Mode is turned on, iOS automatically limits several background activities to conserve battery life, and one of those power-saving measures is reducing the Auto-Lock timer. As a result, the Never option may disappear until you disable Low Power Mode by going to Settings > Battery, turning the feature off, and then returning to the Auto-Lock menu.
Work or School Device Restrictions
If your iPhone is provided by your company, school, or another organization, it may be managed through Mobile Device Management (MDM). These administrative policies can restrict system settings, including Auto-Lock, meaning only the organization’s administrator can modify or remove those limitations if the Never option has been intentionally disabled.
You can also explore These 6 Hidden iPhone Features Will Surprise You to discover useful iPhone tricks and settings that can help you get even more out of your device.
How to Change Auto-Lock Back Later
Disabling Auto-Lock doesn’t have to be a permanent decision. In fact, many iPhone users only turn it off temporarily while completing a specific task, then switch back to a shorter timeout once they’re finished. This approach allows you to enjoy the convenience of an always-on display without sacrificing battery life or security during normal daily use.
Returning Auto-Lock to its previous setting is just as easy as disabling it. Simply open Settings, tap Display & Brightness, select Auto-Lock, and choose the amount of time that best matches your routine. Whether you prefer 30 seconds, 1 minute, or 2 minutes, you can change the setting as often as you like without affecting any other iPhone features.
Best Auto-Lock Time Settings for Different Users
There isn’t a single Auto-Lock setting that’s perfect for everyone because every iPhone owner uses their device differently. Someone who spends the day responding to emails may prefer a longer timeout, while another person who primarily uses their phone for messaging and quick web browsing may benefit from a shorter one. Choosing the right setting depends on how you balance convenience, battery life, and security throughout the day.
Rather than leaving your iPhone configured the same way all the time, consider adjusting Auto-Lock based on your current activity. A shorter timeout works well when you’re on the move, while a longer timeout—or even Never—can be useful during presentations, gaming sessions, or extended reading periods where constant unlocking would become distracting.
For Everyday Use
An Auto-Lock timer of one or two minutes is generally the best choice for everyday use because it provides enough time to read notifications, browse websites, or reply to messages while still protecting your personal information and helping conserve battery power if you forget to lock your phone manually.
For Work
If you regularly reference spreadsheets, reports, presentations, or technical documents, a five-minute Auto-Lock timer can make your workflow more efficient by reducing how often you need to unlock your iPhone while still providing automatic protection after longer periods of inactivity.
For Gaming and Entertainment
When playing games, watching livestreams, following sports scores, or using your iPhone as a secondary display, selecting Never helps eliminate interruptions by keeping the screen awake for the entire session, allowing you to stay focused on the content instead of repeatedly waking the display.
Tips to Save Battery with Auto-Lock Disabled
Although disabling Auto-Lock keeps your iPhone screen awake for as long as you need, it also causes the battery to drain faster than usual. Fortunately, there are several simple habits that can minimize the impact without forcing you to turn Auto-Lock back on immediately. By making a few adjustments, you can enjoy the convenience of an always-on display while still getting reasonable battery life throughout the day.
The key is to use the Never setting only when it truly benefits your current activity. Pairing it with lower screen brightness, charging your iPhone during extended sessions, and manually locking the device when you’re finished can significantly reduce unnecessary power consumption. These small changes take very little effort but can make a noticeable difference, especially if you frequently disable Auto-Lock.
Lower the Screen Brightness
Reducing your screen brightness is one of the easiest and most effective ways to save battery because the display consumes less power at lower brightness levels. Even lowering the brightness by 20 to 30 percent can help extend battery life while keeping the screen comfortable to view indoors.
Use Wi-Fi Whenever Possible
If both Wi-Fi and cellular networks are available, connecting to Wi-Fi generally uses less power than maintaining a mobile data connection, particularly in areas with weak cellular coverage where the iPhone must work harder to maintain a stable signal.
Close Unnecessary Apps
While iOS is designed to manage background apps efficiently, closing apps that are actively streaming media, tracking your location, or performing continuous background tasks can reduce overall power consumption during long periods when the display remains on.
Keep Your iPhone Connected to a Charger
If you’re using your iPhone as a navigation device, presentation screen, recipe display, or desktop clock for several hours, keeping it connected to a charger prevents unnecessary battery drain and ensures the device remains powered throughout your activity.
Lock Your iPhone When You’re Finished
Once you’ve completed your task, remember to manually press the Side button to lock your iPhone instead of leaving the display active. This simple habit immediately stops unnecessary battery usage while also protecting your personal information from anyone nearby.
Common Auto-Lock Problems and Fixes
Most users can change the Auto-Lock setting without any issues, but occasionally the feature doesn’t behave as expected. You might find that the Auto-Lock option is unavailable, the display continues turning off despite selecting Never, or the screen stays awake longer than intended. Fortunately, these issues are usually caused by software settings rather than hardware problems, making them relatively easy to troubleshoot.
Before assuming something is wrong with your iPhone, check your battery settings, Focus modes, software version, and any device management restrictions that may be in place. A quick restart or software update can also resolve temporary glitches that prevent Auto-Lock from working correctly.
Auto-Lock Is Grayed Out
If the Auto-Lock option appears grayed out and can’t be selected, the most common cause is Low Power Mode, which limits certain display settings to conserve battery. Turning off Low Power Mode usually restores full access to the Auto-Lock menu, although managed work or school devices may also restrict this setting.
Screen Still Turns Off
If you’ve selected Never but the screen continues turning off, check whether a specific app controls its own display behavior, whether a Focus mode is affecting the screen, or whether your iPhone simply needs a restart or the latest iOS update to resolve a temporary software issue.
Display Stays On Too Long
If your display never turns off when you expected it to, you may have accidentally left Auto-Lock set to Never after finishing your task. Returning to the Auto-Lock menu and selecting a shorter timeout such as one or two minutes will restore the normal behavior.
Is It Safe to Disable Auto-Lock?
Disabling Auto-Lock is generally safe as long as you understand when it should and shouldn’t be used. Apple includes the feature primarily to improve security and preserve battery life, so turning it off doesn’t damage your iPhone or affect its performance. Instead, it simply changes how long the display remains active before locking automatically.
For users working at home, giving presentations, reading documents, or using their iPhone as a temporary information display, disabling Auto-Lock can be extremely convenient. However, if you’re in public places such as airports, cafés, libraries, or public transportation, leaving your screen unlocked for extended periods may expose personal information to people nearby. In those situations, re-enabling Auto-Lock after you’re finished is the smarter choice.
When Should You Leave Auto-Lock Enabled?
Even though disabling Auto-Lock can be helpful, there are many situations where leaving it enabled remains the better option. During everyday use, Auto-Lock quietly protects your privacy while also helping your battery last longer throughout the day. Most users don’t realize how often they briefly set their phones down, making automatic locking an important safeguard against accidental access.
If your iPhone contains sensitive work documents, financial information, personal conversations, or confidential emails, keeping Auto-Lock enabled adds another layer of protection with virtually no effort. A timeout of one or two minutes offers an excellent balance between convenience and security, ensuring your device remains protected whenever you’re not actively using it.
Conclusion
Disabling Auto-Lock on your iPhone is one of the simplest ways to improve your experience during activities that require the screen to stay visible for an extended period. Whether you’re reading an eBook, following a cooking recipe, using GPS navigation, attending an online meeting, or giving a presentation, selecting the Never option prevents constant interruptions and allows you to focus entirely on the task at hand.
Fortunately, Apple makes changing this setting incredibly easy. With just a few taps inside the Display & Brightness menu, you can enable or disable Auto-Lock whenever your situation changes. There’s no need for third-party apps or complicated configurations, making it a quick adjustment that anyone can perform in less than a minute.
However, convenience should always be balanced with responsibility. Keeping the display awake for long periods naturally increases battery consumption and may expose sensitive information if your iPhone is left unattended. That’s why it’s a good habit to use the Never option only when necessary and switch back to a shorter Auto-Lock timer once you’ve finished your activity.
Ultimately, the best Auto-Lock setting depends on how you use your iPhone each day. By understanding the advantages, limitations, and best practices covered in this guide, you can confidently choose the setting that offers the perfect combination of usability, battery efficiency, and security for your daily routine.
FAQs
1. Why can’t I see the “Never” option in Auto-Lock?
The Never option is often unavailable when Low Power Mode is enabled because iOS automatically limits Auto-Lock to conserve battery. If turning off Low Power Mode doesn’t restore the option, your iPhone may be managed by your workplace or school through device management policies that restrict certain settings.
2. Does disabling Auto-Lock reduce battery life significantly?
Yes. Keeping the display on continuously increases battery usage because the screen is one of the most power-intensive components of an iPhone. The impact depends on factors such as brightness level, network connection, and the apps you’re using, but disabling Auto-Lock generally causes the battery to drain faster than normal.
3. Will disabling Auto-Lock affect Face ID or Touch ID?
No. Face ID and Touch ID continue to function exactly as they normally would. Disabling Auto-Lock only changes when the display automatically turns off and the device locks itself; it doesn’t alter how biometric authentication works.
4. Can I disable Auto-Lock temporarily and turn it back on later?
Absolutely. Many users disable Auto-Lock only while reading, presenting, cooking, or navigating, then switch back to a shorter timeout afterward. You can change the setting as often as needed without affecting your apps or personal data.
5. What Auto-Lock setting is best for everyday use?
For most people, an Auto-Lock timer of one or two minutes provides the ideal balance between convenience, battery life, and security. It keeps your iPhone protected if you forget to lock it manually while still giving you enough time to read or complete everyday tasks without frequent interruptions.